Author: ayan.decloudswebsolutions@gmail.com

  • Camping Essentials Checklist: Everything Beginners Need for Their First Trip

    Camping Essentials Checklist: Everything Beginners Need for Their First Trip

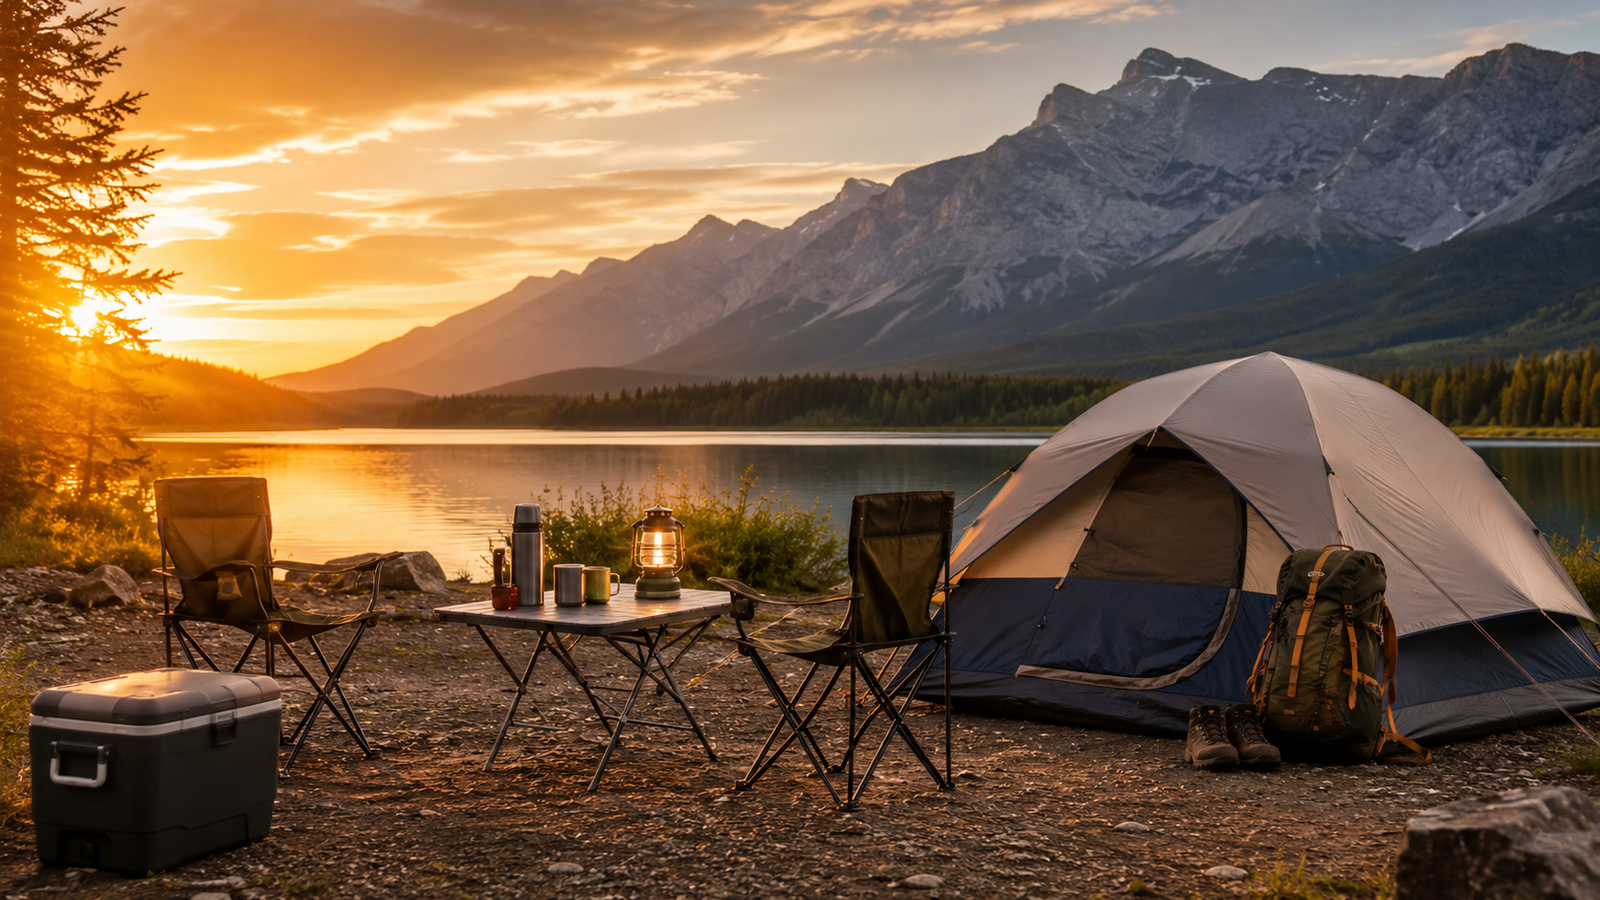
    Your first camping trip should feel like a relaxing escape, not a test of how well you can survive without sleep, food, or a working flashlight, which is why following a well-planned Camping Essentials Checklist is so important.
    The essential camping items every beginner needs are:
    1. A weather-appropriate tent
    2. Sleeping bags
    3. Sleeping pads or camping mattresses
    4. Lighting
    5. Drinking water
    6. Food and cooking equipment
    7. Weather-appropriate clothing
    8. A first-aid kit
    9. Navigation and emergency supplies
    10. Hygiene and waste-disposal products
    You will also need campsite-specific items such as reservation details, food storage equipment, fire supplies, and rain protection.
    The National Park Service recommends carrying its Ten Essentials for outdoor activities: navigation, sun protection, insulation, illumination, first aid, fire, repair tools, nutrition, hydration, and emergency shelter. Your exact packing list should then be adjusted for the destination, season, weather, trip length, and available campground facilities.
    This guide organizes everything into clear categories, helping you prepare without overpacking or spending money on gear you may not need.

    Complete Camping Essentials Checklist

    Use this quick checklist before loading your car.

    Shelter and sleeping

    • Tent with stakes and guylines
    • Tent footprint or groundsheet
    • Sleeping bag
    • Sleeping pad or camping mattress
    • Camping pillow
    • Extra blanket
    • Tent repair kit
    • Mallet or stake hammer

    Campsite comfort

    • Camping chairs
    • A folding table, if one is not provided
    • Headlamps
    • Lantern
    • Spare batteries
    • Shade canopy when appropriate
    • Outdoor mat
    • Small broom and dustpan

    Food and camp kitchen

    • Drinking water
    • Food and snacks
    • Cooler with ice
    • Camping stove and fuel
    • Matches or lighter
    • Cookware
    • Plates, cups and utensils
    • Sharp food-preparation knife
    • Cutting board
    • Can and bottle opener
    • Paper towels
    • Biodegradable soap
    • Dishwashing container
    • Trash bags
    • Food-storage containers

    Clothing and footwear

    • Weather-appropriate layers
    • Rain jacket
    • Warm insulating layer
    • Hiking shoes or sturdy footwear
    • Extra socks
    • Sleep clothing
    • Hat
    • Sunglasses
    • Sun-protective clothing
    • Camp shoes

    Safety and navigation

    • First-aid kit
    • A map or a downloaded offline map
    • Compass or GPS device
    • Emergency contact information
    • Whistle
    • Multi-tool
    • Repair tape
    • Sunscreen
    • Insect repellent
    • Emergency blanket
    • Portable power bank

    Personal care

    • Toilet paper
    • Handwashing supplies
    • Toothbrush and toothpaste
    • Quick-dry towel
    • Prescription medicines
    • Menstrual products
    • Portable toilet where needed
    • Waste-disposal bags

    Useful documents

    • Campground reservation
    • Vehicle pass
    • Entrance pass
    • Fishing or activity permits
    • Identification
    • Emergency contact details
    • Printed directions

    What Camping Gear Do Beginners Actually Need?

    Beginners do not need the lightest, most technical, or most expensive equipment.
    For a first car-camping trip, prioritize:
    • A dry shelter
    • A comfortable sleep system
    • Enough food and safe drinking water
    • Reliable lighting
    • Weather protection
    • Basic safety supplies
    Car camping lets you keep equipment close to your vehicle, so weight and packed size matter less than they do on a backpacking trip. This makes it easier to bring comfortable bedding, a larger cooler, chairs, and simple kitchen equipment.
    Before purchasing anything, check whether you can borrow or rent expensive gear. A tent, sleeping bags, mattresses, a stove, and a cooler can often be shared between several campers.

    1. Choose a Beginner-Friendly Camping Tent

    Your tent is the main barrier between you and rain, wind, insects, and uncomfortable ground conditions.
    For a first trip, choose a tent that is:
    • Large enough for every camper
    • Appropriate for the expected weather
    • Simple to assemble
    • Equipped with a full or substantial rainfly
    • Properly ventilated
    • Tall enough for your preferred comfort level
    A tent’s advertised capacity typically indicates how many sleeping pads fit inside, not how many people can live comfortably with bags, clothing, and other equipment.
    A two-person tent can feel tight for two adults with gear. Couples often prefer a three-person tent, while two adults and two children may be more comfortable in a five- or six-person model.

    Do you need a tent footprint?

    A footprint or groundsheet protects the tent floor from dirt, moisture, and abrasive ground.
    The footprint should not extend beyond the edges of the tent. Exposed material can collect rainwater and direct it underneath the floor.

    Practice before leaving home

    Set up the tent at least once before your trip. Confirm that:
    • All poles are present.
    • Stakes and guylines are included.
    • The rainfly attaches correctly.
    • You understand the setup sequence.
    • The tent fits your sleeping equipment.
    Discovering a missing pole at the campground after sunset is an avoidable way to begin a vacation.
    Our upcoming guide to the best camping tents for beginners and families will compare tent sizes, weather resistance, setup systems, and price ranges.

    2. Build a Comfortable Sleep System

    A sleeping bag alone does not create a comfortable bed.
    A complete camping sleep system includes:
    1. A sleeping bag or insulated quilt
    2. A sleeping pad or camping mattress
    3. A pillow
    4. Dry sleep clothing
    The pad beneath you provides comfort and insulation from the ground. Even a thick sleeping bag can feel cold when placed directly on a cold surface because the insulation beneath your body compresses.

    Sleeping bag temperature ratings

    Choose a sleeping bag based on the lowest temperature realistically expected during the trip not just the average daytime temperature.
    People experience cold differently. Your clothing, sleeping pad, body type, moisture, wind, and fatigue can all affect how warm you feel.
    For cool-weather trips, bringing an extra blanket is a simple precaution when car camping.

    Sleeping pad or camping mattress?

    Choose a sleeping pad when you need:
    • Easier packing
    • Better portability
    • Lower weight
    • A solution suitable for future backpacking
    Choose a camping mattress when you prioritize:
    • More cushioning
    • A larger sleeping surface
    • Car-camping comfort
    • Space for two sleepers
    Check our planned guide to the best camping mattresses and sleeping pads before building your sleep setup.

    3. Pack Reliable Campsite Lighting

    Do not depend entirely on your phone flashlight.
    Each camper should ideally have a headlamp. It keeps both hands free while cooking, setting up the tent, locating equipment, or walking to a restroom after dark.
    Bring:
    • One headlamp per person
    • A lantern for the table or tent
    • Spare batteries or charging equipment
    • A small backup light
    The National Park Service includes illumination among the Ten Essentials and specifically recommends a flashlight or headlamp as part of outdoor emergency preparation.
    Choose a lantern with a lower brightness setting inside the tent. Excessive light can disturb nearby campers and make it more difficult for everyone to enjoy the night sky.

    4. Bring Enough Safe Drinking Water

    Never assume that every campground has potable water.
    Check the official campground page for:
    • Potable-water availability
    • Seasonal shutoffs
    • Boil-water notices
    • Distance from the campsite to the water source
    • Whether water must be carried in
    Bring a refillable bottle for each camper and a larger water container for drinking, cooking, and cleaning.
    Natural water can look clean while still containing harmful microorganisms. When the safety of a water source is uncertain, the CDC recommends boiling it, filtering it, and then disinfecting it with an appropriate method. Product instructions must be followed carefully because filters and treatment systems do not all remove the same contaminants.
    For developed car camping, bringing treated water from home is usually simpler than relying on a natural source.

    5. Create a Simple Camp Kitchen

    Your first camping menu does not need to be complicated.
    Choose meals that:
    • It requires a few ingredients.
    • Use the same cookware.
    • Produce minimal waste
    • Can be prepared quickly
    • Remain safe in your cooler.
    • Fit any campground fire restrictions.
    A basic camp kitchen includes:
    • Camping stove
    • Appropriate fuel
    • Lighter or matches
    • One pot
    • One frying pan
    • Cooking utensil
    • Knife and cutting board
    • Plates, bowls and cups
    • Eating utensils
    • Cooler
    • Water container
    • Food-storage boxes
    • Dishwashing supplies
    • Trash bags
    Do not rely on a campfire as your only cooking method. Fires may be prohibited because of dry weather, wildfire risk, high winds, or local regulations.

    Easy first-trip meal ideas

    Breakfast
    • Oatmeal with fruit
    • Bagels and nut butter
    • Eggs and tortillas
    • Yogurt and granola
    Lunch
    • Sandwiches
    • Wraps
    • Crackers, cheese and fruit
    • Ready-made salads are kept safely chilled.
    Dinner
    • Pasta
    • Tacos
    • Pre-cooked rice bowls
    • Soup
    • Foil meals were permitted.
    Snacks
    • Trail mix
    • Dried fruit
    • Granola bars
    • Fresh fruit
    • Jerky
    • Crackers
    The CDC’s core food-safety guidance is to keep hands and surfaces clean, separate foods that may spread contamination, cook foods properly, and refrigerate perishable items promptly.
    Use a separate cooler for drinks when possible. A food cooler stays cold longer when it is not opened every few minutes.
    Our dedicated camp kitchen setup guide will cover cooking zones, food storage, washing dishes, and equipment organization in greater detail.

    6. Store Food and Scented Products Correctly

    Food storage is not only about protecting your dinner. It protects campers and wildlife.
    Rules vary between destinations. Some campgrounds provide metal food lockers. Other locations require approved bear-resistant canisters, while certain areas permit specific hanging methods. Always follow the rules for the park, forest, or campground you are visiting.
    Treat these items as potential wildlife attractants:
    • Food
    • Trash
    • Coolers
    • Cooking equipment
    • Pet food
    • Toothpaste
    • Deodorant
    • Sunscreen
    • Lip balm
    • Soap and scented toiletries
    Some parks require food and scented products to remain secured whenever they are not being actively used. A normal tent, soft cooler, plastic tote, or unattended backpack is not an approved wildlife-resistant storage system.
    Never leave food or trash outside overnight, even when you have not seen wildlife nearby.

    7. Dress in Layers

    Campground weather may feel very different after sunset.
    A practical clothing system includes:

    Base layer

    Worn next to the skin to manage moisture.

    Insulating layer

    A fleece jacket, a synthetic insulated jacket, or a similar layer that helps retain warmth.

    Weather-protection layer

    A rain jacket or shell that protects against wind and precipitation.
    Also pack:
    • Comfortable hiking or walking footwear
    • Extra socks
    • Dry sleeping clothes
    • Hat
    • Sunglasses
    • Camp shoes
    • Gloves and a warm hat when nights are cool
    Avoid sleeping in damp clothing. Keep one dry set reserved for the tent when rain is expected.
    Check the forecast for both daytime highs and nighttime lows, but prepare for conditions to change.

    8. Carry the Ten Outdoor Essentials

    Even when camping at a developed campground, short hikes and unexpected weather can create problems.
    The National Park Service’s Ten Essentials are:
    1. Navigation: map, compass, or GPS
    2. Sun protection: sunscreen, hat, and sunglasses
    3. Insulation: extra clothing and rain protection
    4. Illumination: headlamp or flashlight
    5. First aid: a suitable first-aid kit
    6. Fire: safe emergency fire-starting supplies where permitted
    7. Repair tools: knife, tape, and basic repair equipment
    8. Nutrition: additional food
    9. Hydration: additional water or treatment equipment
    10. Emergency shelter: emergency blanket, bivy, tarp, or similar protection
    These items are intended to help with common problems such as minor injuries, route confusion, unexpected delays, and sudden changes in weather.
    Adjust the kit to the environment. A desert trip requires more water and sun protection, while a cold mountain campground demands additional insulation and weather protection.

    9. Assemble a Camping First-Aid Kit

    A beginner’s first-aid kit should address minor injuries and provide temporary help while professional assistance is being arranged.
    Consider packing:
    • Adhesive bandages
    • Sterile gauze
    • Medical tape
    • Antiseptic wipes
    • Blister treatment
    • Elastic bandage
    • Tweezers
    • Disposable gloves
    • Any necessary personal medicines
    • Pain relief is normally suitable for you.
    • Emergency contact information
    • First-aid instructions
    Check expiration dates before every trip.
    A kit is more useful when you understand how to use its contents. Consider completing a basic first-aid course, especially when you plan to camp away from developed services.

    10. Use Campfires Responsibly

    A campfire is optional, not an essential part of camping.
    Before lighting one, confirm:
    • Fires are currently permitted.
    • The campground allows them.
    • You are using an approved ring or grate.
    • Wind conditions are safe.
    • Water is immediately available.
    • A responsible adult will supervise it.
    Never leave a fire unattended.
    The National Park Service advises visitors to check current restrictions, use established fire areas where required, keep fires manageable, and fully extinguish them before leaving. A fire is not fully out until the ashes and remains are cool to the touch with no smoldering material.
    Do not move firewood over long distances. Buy it near the campground or follow local rules to reduce the risk of transporting invasive pests.
    When fires are prohibited, use only cooking equipment allowed under the current restriction.

    11. Pack Hygiene and Sanitation Supplies

    Your hygiene kit may include:
    • Toilet paper
    • Handwashing water
    • Soap
    • Hand sanitizer
    • Toothbrush and toothpaste
    • Quick-dry towel
    • Menstrual products
    • Prescription medicines
    • Waste bags
    • Portable toilet if facilities are unavailable
    Hand sanitizer is useful, but it is not a complete substitute for washing hands with soap and clean water in every situation. The CDC particularly emphasizes proper handwashing, access to safe water, and the separation of toilet areas from cooking and food storage spaces when camping.
    Use established toilets whenever they are available.
    In dispersed or backcountry locations, follow the exact human-waste rules issued by the managing agency. Requirements can vary based on soil, elevation, desert conditions, proximity to water, and visitor use.

    12. Bring Basic Repair Equipment

    Small gear failures can become major inconveniences.
    A simple repair kit may contain:
    • Strong repair tape
    • Tent-pole sleeve
    • Tent-fabric patch
    • Mattress patch kit
    • Multi-tool
    • Spare cord
    • Extra tent stakes
    • Zip ties
    • Sewing needle and strong thread
    • Spare stove lighter
    • Additional batteries
    Keep equipment-specific repair pieces together in a labeled bag.
    Inspect your tent, mattress, stove, chairs, and cooler before leaving home, rather than treating the campsite as a testing area.

    13. Choose the Campsite Carefully

    At an assigned campground, remain within your designated site and place your tent on the prepared tent pad where available.
    Look for hazards such as:
    • Dead branches overhead
    • Low areas that may collect water
    • Unstable ground
    • Exposed roots or sharp rocks
    • Strong wind exposure
    • Nearby traffic
    • Insect nests
    • Signs of wildlife activity
    The National Park Service advises campers to look above the tent for dead branches and consider risks such as flash flooding, lightning, strong wind, and unstable terrain when selecting a site.
    In undeveloped areas, camp only where legally permitted. Leave No Trace guidance recommends using durable surfaces and established campsites where possible rather than damaging vegetation to create a new site.

    14. Follow Leave No Trace Principles

    Responsible camping helps protect the places people travel to enjoy.
    The seven Leave No Trace principles are:
    1. Plan ahead and prepare
    2. Travel and camp on durable surfaces
    3. Dispose of waste properly.
    4. Leave what you find
    5. Minimize campfire impacts
    6. Respect wildlife
    7. Be considerate of other visitors.
    These principles apply in remote wilderness, developed campgrounds, local parks, and many other outdoor spaces.
    Practical examples include:
    • Staying within your campsite
    • Packing out trash
    • Avoiding loud music
    • Keeping pets controlled
    • Not feeding wildlife
    • Leaving plants, rocks, and historic objects in place
    • Using established fire rings
    • Following quiet hours
    A good campsite should look almost unchanged after you leave.

    Camping Essentials by Trip Type

    Tent camping essentials

    For a developed tent campground, prioritize:
    • Tent and footprint
    • Sleeping system
    • Lighting
    • Camp chairs
    • Stove and cooler
    • Water
    • First-aid kit
    • Rain protection
    • Hygiene supplies

    Car camping essentials

    Car campers can add:
    • Larger mattress
    • Extra blankets
    • Folding table
    • Shade canopy
    • Larger cooler
    • Storage boxes
    • Portable power station
    • Additional cooking equipment
    Read our best car camping gear guide for a comfort-focused setup.

    Family camping essentials

    Families may also need:
    • Child-sized sleeping equipment
    • Extra clothing
    • Familiar food
    • Sunshade
    • Games and activities
    • Child-safe lighting
    • Additional hygiene supplies
    • Emergency contact cards
    • Child carrier, where appropriate

    Cold-weather camping essentials

    Cold-weather trips require:
    • Properly rated sleeping bag
    • Insulated sleeping pad
    • Base layers
    • Fleece or insulated jacket
    • Warm hat and gloves
    • Dry sleep clothing
    • Additional food
    • Weatherproof shelter
    Do not use an unapproved fuel-burning heater inside a tent. Carbon monoxide, fire, burns, and reduced ventilation can create life-threatening conditions.
    Our guides to keeping a tent warm safely and choosing the best cold-weather sleeping bags will cover this subject in detail.

    Items Beginners Commonly Forget

    These small items frequently cause unnecessary inconvenience:
    • Tent stakes
    • Rainfly
    • Pillow
    • Can opener
    • Bottle opener
    • Lighter
    • Spare batteries
    • Trash bags
    • Dish towel
    • Campground directions
    • Reservation confirmation
    • Charging cable
    • Extra socks
    • Toilet paper
    • Insect repellent
    • Sunscreen
    • Prescription medicines
    Place small essentials in one clearly labeled container instead of spreading them across several bags.

    What Should You Not Bring Camping?

    Avoid packing:
    • Food you cannot store safely
    • Glass containers were prohibited.
    • Firewood is transported from a distant region.
    • Speakers are intended for loud music.
    • Fireworks
    • Unnecessary valuables
    • Equipment you have not checked
    • Excessive single-use products
    • Strongly scented items you do not need
    • Prohibited weapons or tools
    • A generator where campground rules forbid it
    Always read campground regulations before packing. Rules regarding pets, fires, food storage, generators, vehicles, quiet hours, and site occupancy vary.
    Many popular federal campgrounds require reservations, while others operate seasonally or on a first-come basis. The official park page, NPS app, or Recreation.gov listing should be checked before departure.

    How to Pack for Camping Without Overpacking

    Organize equipment into five containers:

    1. Shelter box

    Tent, footprint, stakes, mallet, repair kit, and tarp.

    2. Sleep bag

    Sleeping bags, pads, pillows, blankets, and sleep clothing.

    3. Kitchen box

    Stove, cookware, utensils, cleaning equipment, and dry food.

    4. Safety box

    First aid, lighting, batteries, navigation equipment, repair equipment, and emergency supplies.

    5. Personal bag

    Clothing, toiletries, medicines, a towel, and footwear.
    Keep the items needed first, tent, rain gear, lighting, and reservation information easy to reach.
    Avoid packing the tent beneath every other item. Arriving during rain or darkness becomes much harder when essential equipment is buried.

    First Camping Trip Planning Checklist

    Complete these steps before leaving home:

    One to two weeks before

    • Reserve the campsite
    • Review campground rules
    • Check fire regulations
    • Confirm food-storage requirements
    • Test the tent
    • Inspect sleeping equipment
    • Plan meals
    • Check permit requirements

    Two days before

    • Review the forecast
    • Charge electronics
    • Freeze cooler ice packs.
    • Purchase food
    • Fill fuel containers appropriately.
    • Print or save directions.
    • Download offline maps

    Departure day

    • Fill drinking-water containers
    • Pack refrigerated food
    • Confirm medicines
    • Check lights and batteries.
    • Inform someone of your destination.
    • Recheck road and campground alerts.

    Frequently Asked Questions

    What are the most important camping essentials?

    The most important camping essentials are a suitable tent, sleeping bag, insulated sleeping pad, drinking water, food, lighting, weather-appropriate clothing, first aid, navigation, and emergency supplies.

    What are the Ten Essentials for camping?

    The Ten Essentials are navigation, sun protection, insulation, illumination, first aid, fire, repair tools, extra nutrition, extra hydration, and emergency shelter. They should be adapted to the location, weather, season, and duration of the trip.

    What should a beginner bring on a camping trip?

    A beginner should bring a complete shelter and sleeping setup, basic kitchen equipment, safe drinking water, simple food, lighting, layered clothing, hygiene products, a first-aid kit, and campsite-specific documents or permits.

    How much water should I bring camping?

    The required amount depends on the weather, activity level, individual needs, and cooking and washing. Bring more in hot or dry environments, and verify whether potable water is available at the campground. Never rely on untreated natural water without a suitable treatment plan.

    Do I need a camping stove?

    A camping stove is strongly recommended because campfires may be restricted, unavailable, difficult to light, or unsuitable for controlled cooking. Check whether your stove type is permitted during local fire restrictions.

    Do I need a sleeping pad if I have a sleeping bag?

    Yes. A sleeping pad adds cushioning and helps insulate your body from the ground. A sleeping bag alone may not provide enough insulation because its fill compresses under your weight.

    What food should I bring camping?

    Bring simple meals with minimal preparation, such as oatmeal, sandwiches, wraps, pasta, tacos, soup, fruit, trail mix, and granola bars. Keep perishable foods cold and follow campground food-storage rules.

    Can I keep food inside my tent?

    No. Food, trash, and scented products should not be kept in a sleeping tent. Use the food locker, vehicle, bear-resistant container, or other method required by the campground or land-management agency.

    What is the best camping setup for beginners?

    The easiest setup is usually a reserved drive-in campsite with potable water, toilets, a prepared tent pad, a picnic table, and a fire ring or grill where permitted. This provides an outdoor experience while keeping basic services nearby.

    How early should I reserve a campsite?

    Reserve as soon as your destination and dates are confirmed, especially for summer weekends, holidays, and popular national parks. Reservation windows vary, so check the official campground listing rather than assuming every location follows the same schedule.

    Final Thoughts

    A successful first camping trip does not depend on owning the most expensive equipment. It depends on staying dry, sleeping comfortably, eating safely, preparing for changing conditions, and understanding the rules of your destination.
    Start with the true camping essentials:
    • Reliable shelter
    • A comfortable sleep system
    • Food and safe water
    • Lighting
    • Weather protection
    • First aid
    • Navigation
    • Responsible waste and food storage
    Test your equipment before leaving, check campground alerts, and keep the first trip simple. A well-organized two-night stay at a developed campground is often a better introduction than an ambitious trip with unfamiliar equipment and a packed itinerary.
    Once you understand what you genuinely use, you can gradually improve your camping setup without wasting money or filling your vehicle with unnecessary gadgets.
  • 15 Best National Parks in the USA for First-Time Visitors

    15 Best National Parks in the USA for First-Time Visitors

    Your first national park trip should feel exciting, not like an outdoor survival exam.
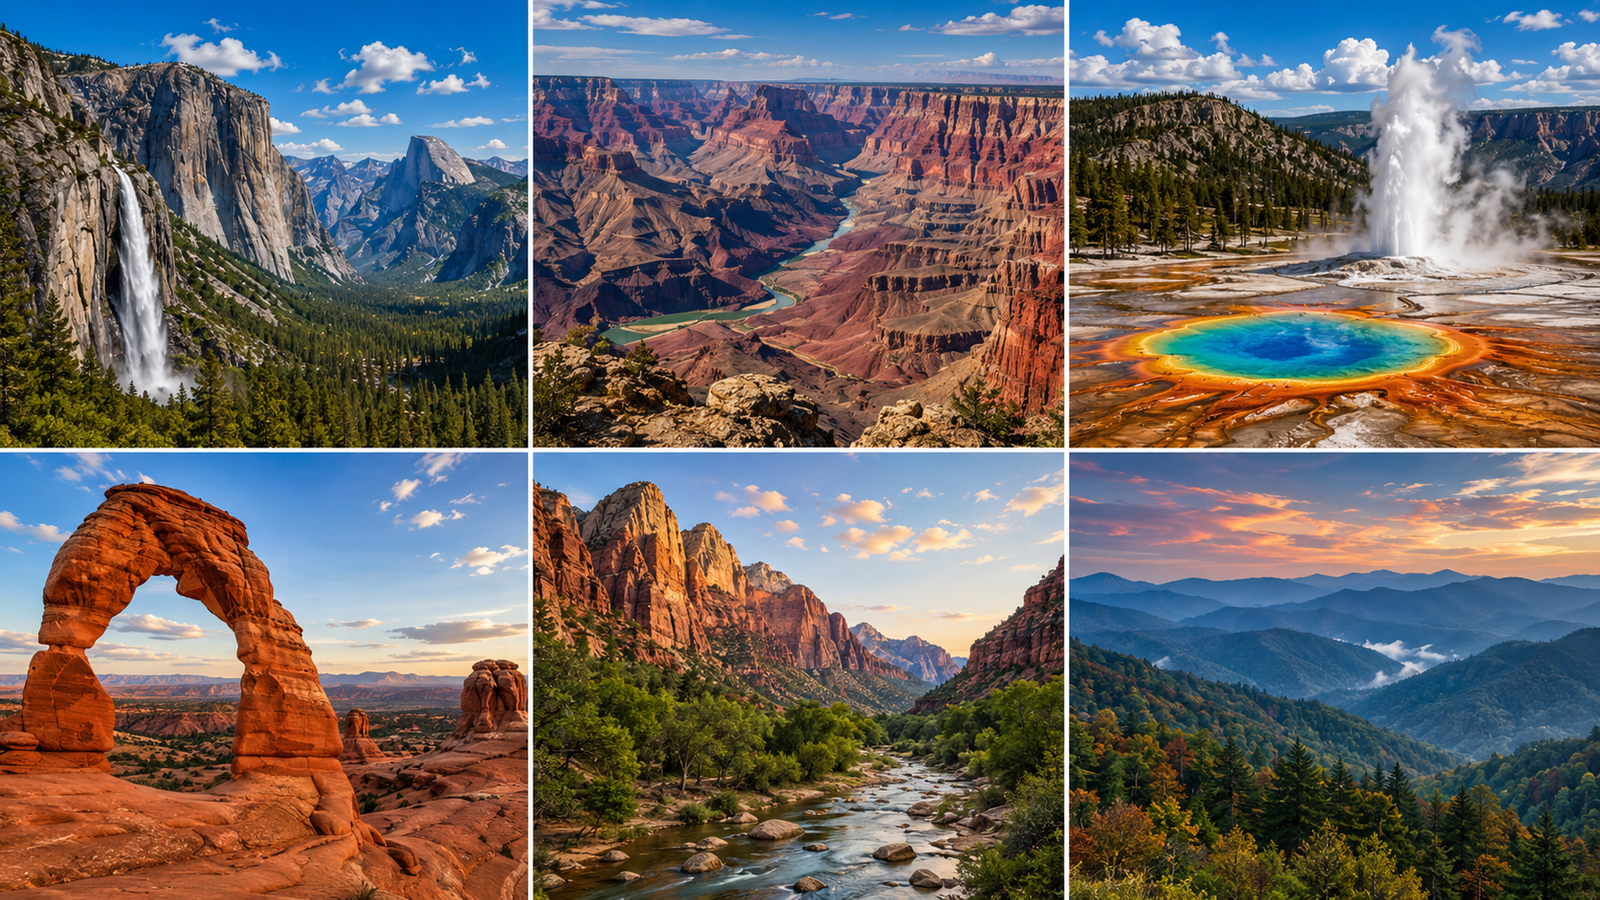
    The best national parks for first-time visitors offer extraordinary scenery without requiring advanced hiking skills, specialized equipment, or days of complicated planning. They have accessible viewpoints, clearly marked trails, scenic roads, visitor centers, and enough variety to satisfy hikers and non-hikers alike.
    For the easiest first experience, start with Great Smoky Mountains National Park for waterfalls and mountain scenery, Grand Canyon National Park for an immediate wow factor, Acadia National Park for a compact coastal escape, or Bryce Canyon National Park for remarkable views that require very little walking.
    This guide compares 15 of the best national parks in the USA based on accessibility, scenery, beginner-friendly activities, visitor services, seasonal conditions, and overall planning difficulty.

    Planning note: Entrance fees, road access, permits, shuttle schedules, and reservation systems can change. Always review the park’s official National Park Service alerts before leaving home.

    Best National Parks for First-Time Visitors at a Glance

    National park State Best for Ideal first trip Planning level
    Great Smoky Mountains Tennessee and North Carolina Forests, waterfalls and wildlife 3–4 days Easy
    Grand Canyon Arizona Iconic views and scenic walks 2–3 days Easy
    Acadia Maine Coastal scenery and compact exploration 3–4 days Moderate
    Bryce Canyon Utah Hoodoos and easy viewpoints 1–2 days Easy
    Yellowstone Wyoming, Montana and Idaho Geysers and wildlife 4–5 days Moderate
    Zion Utah Canyon scenery and accessible walks 2–3 days Moderate
    Yosemite California Waterfalls, granite cliffs and valleys 3–4 days Moderate
    Grand Teton Wyoming Mountain views, lakes and wildlife 2–3 days Easy
    Joshua Tree California Desert landscapes and stargazing 2 days Easy
    Arches Utah Natural arches and scenic drives 2 days Easy
    Shenandoah Virginia Scenic driving and short hikes 2–3 days Easy
    Badlands South Dakota Geology, wildlife and road trips 1–2 days Easy
    Everglades Florida Wildlife, wetlands and paddling 2 days Easy
    Haleakalā Hawaii Volcanic scenery and sunrise views 1–2 days Moderate
    Cuyahoga Valley Ohio Waterfalls, biking and family trips 1–2 days Easy
    Our list is not based only on fame. We prioritized parks that give beginners a strong scenic reward while still offering practical roads, short trails, ranger programs, nearby accommodation, and activities for different fitness levels.

    1. Great Smoky Mountains National Park

    Best overall national park for first-time visitors
    Great Smoky Mountains National Park is an excellent introduction to America’s national parks because it combines mountain scenery, waterfalls, historic buildings, wildlife, and family-friendly drives.
    Cades Cove is one of the easiest places to begin. It’s an 11-mile, one-way loop that passes mountain views, historic structures, trailheads, and wildlife-viewing areas. Newfound Gap Road provides another scenic introduction, while shorter walks lead to waterfalls and forest viewpoints.
    The park does not charge a traditional entrance fee, although vehicles parked for more than 15 minutes must display a valid parking tag.
    Best time to visit: April to May or September to early November
    Ideal stay: Three to four days
    Beginner highlight: Cades Cove Loop
    Good base towns: Gatlinburg, Townsend or Cherokee
    Visit early in the morning to avoid heavy traffic, especially in Cades Cove and around popular trailheads.

    2. Grand Canyon National Park

    Best for an unforgettable first view
    Few destinations create a stronger first impression than the Grand Canyon. At the South Rim, first-time visitors can walk to major viewpoints, take free shuttle buses, attend ranger programs, and enjoy a sunset without having to complete a difficult hike.
    The South Rim remains open year-round and is the best choice for a first visit. Start at Mather Point, explore the Rim Trail, ride the shuttle toward Hermit Road, and drive to Desert View Watchtower.
    Avoid attempting a rim-to-river hike during your first visit unless you have appropriate conditioning and desert-hiking experience.
    Temperatures inside the canyon can be dramatically hotter than those at the rim.
    The South Rim offers visitor services, parking areas, free shuttle routes, lodging, campgrounds and multiple scenic viewpoints.
    Best time to visit: March to May or September to November
    Ideal stay: Two to three days
    Beginner highlight: Rim Trail between Mather Point and Yavapai Point
    Good base: Grand Canyon Village or Tusayan

    3. Acadia National Park

    Best combination of coast, mountains and small-town charm
    Acadia feels more manageable than many western parks because its major attractions are concentrated around Mount Desert Island.
    Visitors can experience the rocky Atlantic coastline, forest trails, carriage roads, lakes and mountain viewpoints in one trip. Drive Park Loop
    Road, walk the Ocean Path, visit Jordan Pond, and spend time in nearby Bar Harbor.
    Acadia requires an entrance pass year-round. A separate vehicle reservation is required to drive Cadillac Summit Road from approximately mid-May through mid-October, and those reservations are sold online rather than at the park. Campsites must also be reserved in advance.
    Best time to visit: Late May to June or September to October
    Ideal stay: Three to four days
    Beginner highlight: Ocean Path
    Good base: Bar Harbor
    The free seasonal Island Explorer bus can reduce the stress of finding parking around popular areas.

    4. Bryce Canyon National Park

    Best dramatic scenery with minimal hiking
    Bryce Canyon is one of the most visually rewarding national parks for travelers who do not want to complete long hikes.
    The park’s famous hoodoos can be viewed from Sunrise Point, Sunset Point, Inspiration Point and Bryce Point. These overlooks are located within the first few miles of the park, making it possible to see extraordinary scenery during a relatively short visit.
    No advance reservation is currently required simply to enter Bryce Canyon. A seasonal shuttle operates around the Bryce Amphitheater area between spring and fall, helping visitors avoid parking congestion.
    Best time to visit: May to June or September to October
    Ideal stay: One to two days
    Beginner highlight: Sunset Point to Sunrise Point
    Good base: Bryce Canyon City
    Bryce sits at a high elevation. Pack warm layers even when other areas of southern Utah are hot.

    5. Yellowstone National Park

    Best for geysers and wildlife
    Yellowstone can feel overwhelming because of its size, but it remains one of the top national parks in the US for a first major outdoor vacation.
    Its most famous geothermal attractions are accessible by roads and boardwalks. First-time visitors can see Old Faithful, walk through the Upper Geyser Basin, visit Grand Prismatic Spring, explore the Grand Canyon of the Yellowstone, and look for wildlife in Hayden or Lamar Valley.
    Yellowstone does not require a vehicle reservation to enter in 2026, but accommodations and campgrounds fill up far in advance. The park recommends arriving before 7 a.m. or after midday during peak periods.
    Stay on marked boardwalks in thermal areas. Visitors should remain at least 100 yards from bears and wolves and 25 yards from animals such as bison and elk.
    Best time to visit: Late May to June or September
    Ideal stay: Four to five days
    Beginner highlight: Old Faithful and Upper Geyser Basin
    Best strategy: Stay in two areas rather than driving across the entire park daily

    6. Zion National Park

    Best for towering canyon walls
    Zion offers some of the most dramatic canyon scenery in the country. Fortunately, you do not need to hike Angels Landing to appreciate it.
    Begin with the Pa’rus Trail, Riverside Walk, Canyon Overlook Trail or a ride through Zion Canyon. The park’s shuttle system connects major locations in Zion Canyon during its operating season.
    A recreational-use pass is required for park entry. Riding the main park shuttle does not require a separate reservation, but hiking the chained section of Angels Landing requires a permit.
    Best time to visit: March to May or October to November
    Ideal stay: Two to three days
    Beginner highlight: Riverside Walk
    Good base: Springdale
    Flash floods can affect narrow canyons, including the Narrows. Always check weather forecasts and park alerts before entering a canyon.

    7. Yosemite National Park

    Best for waterfalls and iconic valley scenery
    Yosemite Valley delivers an exceptional amount of scenery within a relatively compact area. Visitors can see El Capitan, Half Dome, Yosemite Falls, Bridalveil Fall and the Merced River without completing strenuous hikes.
    The Lower Yosemite Fall Trail and sections of the Valley Loop Trail are suitable for many beginners. More ambitious visitors can explore Glacier Point, Mariposa Grove or Tuolumne Meadows when seasonal roads are open.
    An advance reservation is not required simply to enter Yosemite in 2026, although the entrance fee still applies. NPS strongly recommends booking lodging, campgrounds and backpacking trips in advance. It also advises arriving before 9 a.m. or after 5 p.m. during busy months to reduce traffic delays.
    Best time to visit: May to June for waterfalls or September for lighter crowds
    Ideal stay: Three to four days
    Beginner highlight: Lower Yosemite Fall Trail
    Good base: Yosemite Valley or El Portal

    8. Grand Teton National Park

    Best mountain scenery from the road
    Grand Teton is ideal for first-time visitors who want dramatic alpine scenery without having to plan a technical mountain adventure.
    Teton Park Road provides frequent mountain views and designated turnouts for photography and wildlife watching. Jenny Lake is another natural starting point, with shoreline views, boat access and trails to Hidden Falls and Inspiration Point.
    The park offers scenic drives, hiking, paddling, wildlife viewing, campgrounds and visitor services. Jenny Lake is among its most visited areas and sits directly below the Teton Range.
    Best time to visit: June to September
    Ideal stay: Two to three days
    Beginner highlight: Jenny Lake and Hidden Falls
    Good base: Jackson, Moose or Colter Bay
    Grand Teton pairs naturally with Yellowstone, but give each park enough time rather than rushing through both in two days.

    9. Joshua Tree National Park

    Best beginner-friendly desert park
    Joshua Tree combines unusual trees, giant boulder formations, desert viewpoints and dark skies. Many highlights are accessible through short walks or roadside stops.
    Walk the Hidden Valley Trail, explore Barker Dam, visit Cap Rock, and watch the sunset from Keys View. Rock climbers will find countless routes, but climbing is not necessary to enjoy the park.
    The desert environment requires preparation. There are no restaurants, grocery stores, hotels, or gas stations inside the park, and water is unavailable there. NPS warns visitors to avoid strenuous hiking during the hottest part of the day and to carry sufficient water.
    Best time to visit: October to April
    Ideal stay: Two days
    Beginner highlight: Hidden Valley Trail
    Good base: Joshua Tree, Twentynine Palms or Palm Springs
    Explore our separate guide to the best hikes in Joshua Tree before choosing your trails.

    10. Arches National Park

    Best for short hikes with huge scenic rewards
    Arches National Park protects more than 2,000 natural stone arches along with pinnacles, balanced rocks and red-rock fins.
    Many famous formations are relatively easy to reach. Beginners can walk to Windows, Double Arch, Balanced Rock and Landscape Arch. Delicate Arch requires a longer and more exposed hike, but it can also be viewed from designated viewpoints.
    Timed-entry reservations are not required to enter Arches during 2026. However, entrance access may temporarily pause when parking areas and roads become congested. Reservations remain necessary for Devils Garden Campground and certain Fiery Furnace experiences.
    Best time to visit: March to May or September to October
    Ideal stay: Two days
    Beginner highlight: Windows and Double Arch
    Good base: Moab
    Pair this visit with our complete Arches National Park guide and three-day Moab itinerary.

    11. Shenandoah National Park

    Best scenic drive near major East Coast cities
    Shenandoah is accessible from Washington, D.C., northern Virginia and much of the Mid-Atlantic. Its main attraction, Skyline Drive, follows the crest of the Blue Ridge Mountains.
    Skyline Drive runs for 105 miles and connects overlooks, trailheads, campgrounds, dining facilities and lodging. Driving its full length takes approximately three hours without extended stops.
    Begin with Stony Man Trail, Dark Hollow Falls or a selection of overlooks. Visitors who prefer a relaxed trip can experience much of the scenery without having to hike far.
    Best time to visit: April to May or October
    Ideal stay: Two to three days
    Beginner highlight: Skyline Drive and Stony Man
    Good base: Front Royal, Luray or Charlottesville
    Expect heavy traffic during peak fall-color weekends.

    12. Badlands National Park

    Best national park for a short road trip stop
    Badlands is easy to incorporate into a South Dakota road trip and offers a landscape unlike that of almost anywhere else in the country.
    Most first-time visitors explore the park along Badlands Loop Road. The paved road is suitable for regular vehicles and connects scenic overlooks, short trails and wildlife-viewing areas.
    The Fossil Exhibit Trail is an easy family option, while the Door Trail provides a closer look at the formations. Visitors may also see bison, bighorn sheep, prairie dogs and other wildlife.
    Best time to visit: May to June or September
    Ideal stay: One to two days
    Beginner highlight: Badlands Loop Road
    Good base: Wall or Interior
    Summer afternoons can become extremely hot, while thunderstorms and strong winds can develop quickly.

    13. Everglades National Park

    Best for wildlife and wetland ecosystems
    Everglades National Park offers a completely different experience from mountain and desert parks. Its defining attractions are wildlife, wetlands, mangroves and slow-moving water.
    First-time visitors can walk the Anhinga Trail, join a ranger program, take a tram or bicycle tour, paddle a marked route, or book a guided boat trip. The park has multiple entrances, so choose one region rather than trying to cover everything in one day.
    NPS highlights paddling, hiking and ranger programs among the park’s core activities and advises visitors to prepare for seasonal heat, mosquitoes and changing conditions.
    Best time to visit: December to April
    Ideal stay: Two days
    Beginner highlight: Anhinga Trail
    Good base: Homestead, Miami or Everglades City
    Never approach or feed alligators or crocodiles, even when they appear inactive.

    14. Haleakalā National Park

    Best volcanic landscape and sunrise experience
    Haleakalā National Park rises from Maui’s coastline to a high volcanic summit above the clouds.
    The summit district offers overlooks, volcanic scenery and hiking trails, while the Kīpahulu district features rainforest, coastline and waterfalls. Because the two districts are not connected by a direct road inside the park, they should usually be visited on separate days.
    A reservation is required for entry to the summit district during designated sunrise hours. The summit can be cold and windy even when Maui’s beaches are warm. NPS encourages visitors to plan carefully because of crowds and changing mountain conditions.
    Best time to visit: Year-round
    Ideal stay: One day per district
    Beginner highlight: Summit overlooks
    Good base: Upcountry Maui, Kahului or Hana
    Visitors sensitive to elevation should move slowly and avoid strenuous activity immediately after reaching the summit.

    15. Cuyahoga Valley National Park

    Best easy national park for families and weekend visitors
    Cuyahoga Valley sits between Cleveland and Akron, making it one of the most accessible national parks for an uncomplicated weekend trip.
    Visitors can hike, bike the Towpath Trail, attend ranger programs, explore historic areas, or ride the scenic railroad when it is operating. Unlike more remote western parks, food, hotels and urban services remain close by.
    NPS describes hiking, biking, ranger-led programs, the Towpath Trail and the scenic railroad as major ways to experience the park. It also warns that Northeast Ohio weather can change quickly and recommends layers, rain protection and sturdy footwear.
    Best time to visit: April to June or September to October
    Ideal stay: One to two days
    Beginner highlight: Brandywine Falls area and Towpath Trail
    Good base: Peninsula, Cleveland or Akron

    Which National Park Should You Visit First?

    Choose according to the type of experience you want:
    • Best overall: Great Smoky Mountains
    • Best immediate wow factor: Grand Canyon
    • Best for non-hikers: Bryce Canyon
    • Best for wildlife: Yellowstone
    • Best for coastal scenery: Acadia
    • Best for families: Cuyahoga Valley
    • Best for a scenic road trip: Shenandoah or Badlands
    • Best for desert scenery: Joshua Tree
    • Best for mountain views: Grand Teton
    • Best for a short Utah trip: Arches
    • Best tropical experience: Haleakalā or Everglades
    The most beautiful national park in the US is subjective. Yosemite, Grand Canyon, Yellowstone, Acadia and Grand Teton are frequently considered the strongest choices because each offers a distinctive landscape rather than a single attraction.

    Best National Parks to Visit in May

    May is an excellent travel month because spring conditions have reached many lower-elevation parks while peak summer crowds have not yet arrived everywhere.
    Strong options include:

    Great Smoky Mountains

    Expect green forests, flowing waterfalls and spring wildflowers. Higher elevations may remain cooler than nearby towns.

    Shenandoah

    Spring foliage, waterfalls and mild hiking weather make May especially appealing.

    Grand Canyon South Rim

    Daytime conditions are generally more manageable than midsummer temperatures, although weather can still vary significantly by elevation.

    Arches

    May provides long daylight hours, but visitors should hike early as daytime heat increases.

    Yosemite

    Waterfalls are often a major attraction during spring snowmelt, although high-elevation roads may still be seasonally closed.
    Yellowstone, Grand Teton and higher parts of the Rocky Mountains can retain snow in May. Check road conditions and openings before building a fixed itinerary.

    How to Plan Your First National Park Trip

    Choose one region of a large park.

    Do not attempt to see every Yellowstone basin, Yosemite district or Everglades entrance in a single day. Select a manageable area and leave time for unexpected stops.

    Book accommodation early

    In-park lodges and popular campgrounds can fill up months in advance. Reserving accommodation first makes the rest of your itinerary easier to organize.

    Review entry and permit requirements.

    Some parks require special reservations for a road, sunrise period, trail, campground or backcountry activity even when a general entry reservation is unnecessary.
    In 2026, NPS entrance pass rules and prices differ in some cases between US residents and international visitors. Confirm the current cost and eligibility directly through official NPS information before purchasing.

    Download offline maps

    Cell service is unreliable in many national parks. Download the NPS app’s offline park content and save your accommodation address before arriving.

    Begin early, but avoid an exhausting schedule.

    An early start improves parking availability and wildlife-viewing opportunities. However, trying to watch the sunrise, complete a major hike, and drive for several hours on the same day can turn a vacation into a stressful checklist.

    Carry more water than you expect to need

    This is particularly important in Joshua Tree, Arches, Zion, Grand Canyon and Badlands. Do not assume that water will be available at every trailhead.

    Respect wildlife and thermal areas

    Use a zoom lens rather than approaching animals. Stay on established boardwalks around geysers, hot springs and fragile terrain.

    Frequently Asked Questions

    What is the best national park for a first-time visitor?

    The Great Smoky Mountains is the strongest all-around choice because it offers scenic roads, waterfalls, wildlife, short hikes, historic locations and several nearby gateway towns. The Grand Canyon is better for travelers who want the most dramatic first view with minimal hiking.

    Which national park is easiest to visit?

    Cuyahoga Valley, Shenandoah, Bryce Canyon and Badlands are among the easiest. Their major attractions are connected by roads, short walks or accessible viewpoints.

    What are the best national parks for people who do not hike?

    Grand Canyon, Bryce Canyon, Yellowstone, Grand Teton, Shenandoah and Badlands all provide excellent scenery from roads, overlooks, shuttles or short paved paths.

    How many days should a first national park trip last?

    Allow at least two full days for a smaller park and three to five days for a large park. Yellowstone generally deserves four or five days, while Bryce Canyon or Badlands can fit into a one- or two-day itinerary.

    Do all national parks require reservations?

    No. Most parks do not require a general entry reservation, but individual roads, trails, campgrounds, sunrise periods or tours may require advance booking. For example, Acadia requires reservations for Cadillac Summit Road during part of the year, Zion requires permits for Angels Landing, and Haleakalā requires sunrise reservations. Arches and Yosemite do not require general timed-entry reservations in 2026.

    What are the best national parks in Texas?

    Texas has two official national parks: Big Bend National Park and Guadalupe Mountains National Park. Big Bend is better for desert drives, varied trails and stargazing, while Guadalupe Mountains is stronger for mountain hiking. First-time visitors should avoid demanding desert hikes during extreme heat.

    Is a national park annual pass worth buying?

    An annual pass may provide good value when you plan to visit several fee-charging national parks or other participating federal recreation sites during a 12-month period. Compare the current pass price with the individual entrance fees for your planned itinerary before purchasing.

    Which national park is best for families?

    Great Smoky Mountains, Acadia, Bryce Canyon, Cuyahoga Valley and Grand Canyon’s South Rim are strong family choices because they combine visitor services with short walks, ranger activities and scenic attractions.

    Final Thoughts

    The best first national park is not necessarily the largest, wildest or most difficult. It is the park that gives you enough time to slow down, take in the landscape, and enjoy being outdoors without feeling rushed or unprepared.
    Choose the Great Smoky Mountains for a balanced mountain escape, the Grand Canyon for an unforgettable first view, Acadia for coastal variety, Bryce Canyon for easy scenery, or Yellowstone for a longer wildlife and geothermal adventure.
    Whichever park you choose, check current conditions, reserve essential activities early and leave room in your itinerary for the moments you did not plan. Those unexpected overlooks, wildlife sightings and quiet trails are often what make a first national park trip memorable.